
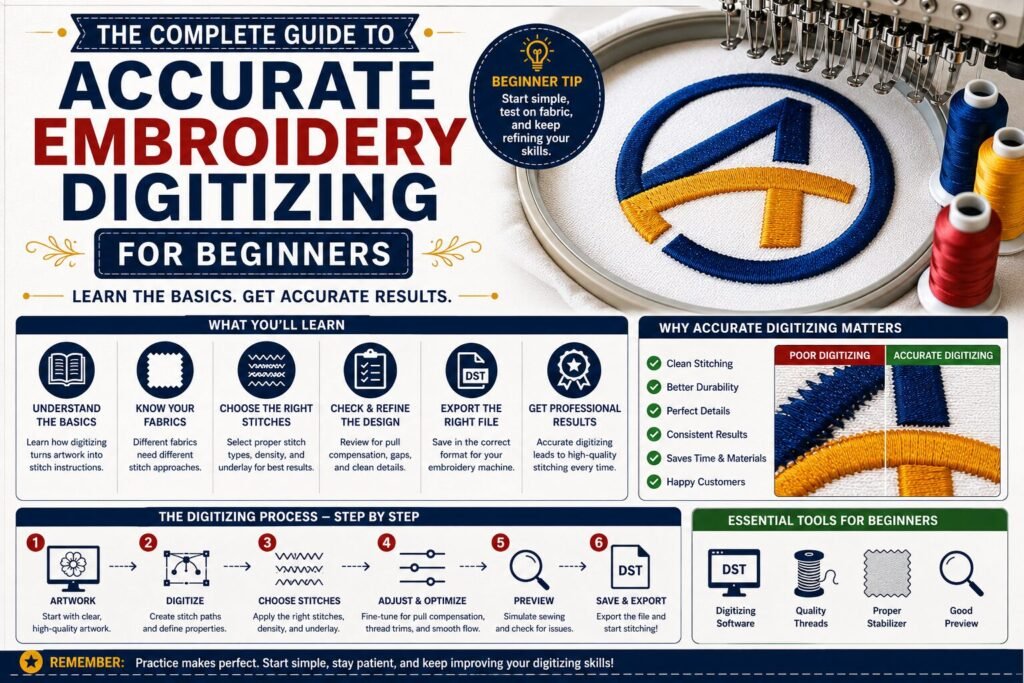

Embroidery digitizing is an important process that transforms artwork into instructions an embroidery machine can understand. A digital logo may look perfect on a computer screen, but embroidery requires careful planning because thread, fabric, needle movement, and stitch density all affect the finished result. Learning the basics of accurate embroidery digitizing can help beginners understand why some embroidery designs stitch smoothly while others develop gaps, puckering, thread breaks, or unclear details.
Professional digitizing involves more than converting an image into an embroidery format. The digitizer must decide how each part of the design should be stitched, which stitch types are appropriate, how dense the stitches should be, where underlay is needed, and how the design should be sequenced.
This complete guide explains the fundamentals beginners should understand before creating or ordering embroidery files.
What Is Embroidery Digitizing?
Embroidery digitizing is the process of converting artwork into a machine-readable embroidery file.
The original artwork may be a JPG, PNG, AI, EPS, PDF, or another graphic format. A digitizer analyzes the artwork and converts its visual elements into stitches.
The resulting file contains instructions that tell the embroidery machine where to move, which stitch to use, and how the design should be sewn.
Common embroidery file formats include DST, PES, EXP, JEF, VP3, and other formats depending on the embroidery machine.
Why Accurate Digitizing Matters
An embroidery machine follows the instructions in the digitized file. If the file contains poor stitch planning, the machine will reproduce those problems during production.
Accurate digitizing helps control:
- Stitch placement
- Stitch density
- Stitch direction
- Underlay
- Stitch sequencing
- Pull compensation
- Small details
- Thread changes
These factors work together to determine the quality of the finished embroidery.
Understanding Different Stitch Types
Beginners should become familiar with the main stitch types used in machine embroidery.
Satin Stitches
Satin stitches are commonly used for borders, lettering, narrow columns, and other areas requiring a smooth appearance.
They work particularly well when the width is appropriate for the stitch type.
Fill Stitches
Fill stitches cover larger areas of a design.
They can be adjusted through stitch direction and density to create smooth and consistent coverage.
Running Stitches
Running stitches are useful for thin outlines, fine details, and lightweight design elements.
Because running stitches use a simple path, they are useful when a design contains narrow lines that do not require heavy coverage.
Understanding Stitch Density
Stitch density refers to how closely stitches are placed within an embroidered area.
Too much density can create excessive thread buildup, stiffness, fabric puckering, and thread breaks.
Too little density can create gaps and allow the underlying fabric to become visible.
Beginners should avoid applying the same density settings to every design. The correct density depends on the fabric, thread, stitch type, design size, and other production factors.
The Importance of Underlay
Underlay is a foundation layer placed beneath the visible embroidery.
It helps stabilize the fabric and supports the top stitches. Proper underlay can improve coverage and help prevent design distortion.
Different fabrics require different approaches. A lightweight garment may need different underlay from a thick jacket, cap, towel, or stretch material.
Understanding the fabric before selecting underlay settings is an important part of accurate digitizing.
Understanding Stitch Direction
Stitch direction affects the appearance and stability of embroidery.
Changing the direction of stitches can create visual contrast and help shape different areas of a design.
For example, adjacent sections may use different stitch directions to make them easier to distinguish. Proper direction can also help manage fabric movement and improve the overall appearance of filled areas.
Pull Compensation Explained
During embroidery, stitches can pull fabric toward the center of a design.
This movement may affect circles, borders, lettering, and other shapes. Pull compensation allows the digitizer to account for this behavior when preparing the file.
Without appropriate compensation, a design may not reproduce the same proportions as the original artwork.
Choosing the Correct Design Size
The finished embroidery size is an important consideration before digitizing begins.
A design created for a large jacket back may not work correctly when reduced to a small chest logo. Small designs have less space for details and may require simplified shapes or modified lettering.
For significantly different sizes, separate embroidery files are often the better choice.
Why Fabric Selection Matters
Embroidery behaves differently on different materials.
Cotton, polyester, denim, fleece, canvas, towels, caps, and stretch garments each have different levels of stability and thickness.
A design that works well on a stable cotton shirt may require adjustments when stitched onto a stretchy sports garment.
Beginners should always consider the intended fabric before finalizing the embroidery file.
Small Lettering and Fine Details
Small text is one of the most challenging parts of embroidery.
Thread and needle sizes limit how much detail can be reproduced. If letters are too small, their openings can close and individual characters may become difficult to recognize.
Professional digitizers often simplify small lettering, adjust spacing, modify stitch widths, or recommend a larger finished size when necessary.
The goal is not to reproduce every pixel of the original artwork but to create an embroidered result that remains readable.
Stitch Sequencing
Stitch sequencing determines the order in which the machine sews different sections of the design.
A logical sequence can reduce unnecessary trims, jump stitches, thread changes, and machine movements.
Poor sequencing may cause sections to overlap incorrectly or create unnecessary production time.
Beginners should therefore think about the complete sewing path rather than treating each design element as an isolated object.
Thread and Needle Considerations
Thread and needle selection can influence embroidery quality.
The thread type, thread weight, needle size, fabric thickness, and machine settings all work together.
Using a needle that is unsuitable for the fabric or thread can contribute to thread breaks, fabric damage, or poor stitch formation.
The digitizing process should therefore be considered alongside the actual production setup.
Selecting the Correct Embroidery File Format
Different embroidery machines use different file formats.
Some commonly used formats include:
- DST
- PES
- EXP
- JEF
- VP3
Before ordering or exporting a design, confirm which format your machine requires.
Providing the wrong file format may prevent the machine from opening the design correctly.
Testing the Embroidery File
A digital preview cannot always predict how a design will behave on actual fabric.
A test stitch-out allows you to evaluate density, lettering, alignment, thread coverage, and fabric behavior.
For commercial embroidery, testing is especially important when working with a new fabric, unusual design size, or detailed logo.
Any problems identified during testing can then be corrected before the full production run.
Common Digitizing Mistakes Beginners Make
Beginners often try to use the same settings for every design.
Other common mistakes include excessive stitch density, ignoring fabric type, creating overly detailed small designs, using inefficient stitch sequences, and failing to test the file.
Another mistake is assuming that automatic conversion will always produce a production-ready embroidery file. Automated tools can create a starting point, but complex designs often require manual adjustments.
Manual Digitizing vs. Automatic Conversion
Automatic digitizing software can convert artwork into stitches quickly, but it may not account for the physical behavior of fabric and thread.
Automatic results can contain excessive stitches, poor sequencing, unsuitable underlay, and problems with small details.
Manual digitizing gives the operator more control over each part of the design. An experienced digitizer can adjust settings based on the fabric, finished size, and production requirements.
For business logos and detailed commercial designs, manual preparation can provide more reliable results.
How Beginners Can Improve Their Digitizing Skills
Beginners should start with simple designs before working on complex logos.
Practice creating basic shapes, lettering, borders, and filled areas. Learn how different stitch types behave on different fabrics and test your designs regularly.
Studying stitch density, underlay, pull compensation, sequencing, and fabric behavior will gradually improve your understanding.
It is also useful to compare the digital preview with actual stitch-outs because physical embroidery can reveal issues that are difficult to identify on a computer screen.
When to Hire a Professional Digitizer
Not every embroidery project needs to be digitized personally.
Businesses working with important logos, large production orders, detailed artwork, or multiple fabric types may benefit from professional digitizing.
An experienced digitizer can prepare the file according to the intended application and make adjustments that reduce production problems.
For beginners, professional digitizing can also provide a useful reference for understanding how artwork is adapted for machine embroidery.
How to Choose an Embroidery Digitizing Service
When selecting a provider, review examples of actual stitched work rather than relying only on digital previews.
Look for experienced digitizers, manual preparation, multiple machine formats, quality control, revision support, and clear communication.
Provide the original artwork, finished embroidery size, fabric type, placement, machine format, and any other production requirements.
This information gives the digitizer a better understanding of what the final file needs to accomplish.
Conclusion
Accurate embroidery digitizing combines artwork preparation with an understanding of stitches, fabric, thread, needles, and machine behavior. Beginners who understand stitch types, density, underlay, stitch direction, pull compensation, sequencing, sizing, and testing will have a stronger foundation for creating reliable embroidery files.
The most important lesson is that embroidery is a physical production process. A design that looks good on a screen may still require adjustments before it produces high-quality stitching. Careful testing and fabric-specific planning are essential for dependable results.
For businesses and individuals who prefer professional assistance, iDigitize provides accurate embroidery digitizing services designed to create machine-ready files for logos, apparel, caps, jackets, promotional products, and other embroidery applications.
Frequently Asked Questions
Q1. What is embroidery digitizing for beginners?
Embroidery digitizing is the process of converting artwork into instructions that an embroidery machine can use to stitch a design.
Q2. What are the main stitch types?
The most common stitch types include satin stitches, fill stitches, and running stitches. Each serves a different purpose depending on the design.
Q3. Why does fabric type matter in digitizing?
Different fabrics stretch, stabilize, and react to stitches differently. Digitizing settings should therefore be adjusted according to the material.
Q4. What is stitch density?
Stitch density refers to how closely stitches are placed in a specific area. Balanced density helps achieve proper coverage without excessive thread buildup.
Q5. Why is underlay important?
Underlay provides support beneath visible stitches, helping stabilize the fabric and improve the quality of the top embroidery.
Q6. Should different sizes use different embroidery files?
For significantly different sizes, separate files may be necessary because stitch settings and design details often need to be adjusted.
Q7. Is automatic digitizing suitable for beginners?
Automatic digitizing can be useful for learning and simple designs, but complex or commercial embroidery often benefits from manual adjustments by an experienced digitizer.
Q8. What should I provide to a professional digitizer?
Provide the original artwork, finished size, fabric type, placement, machine format, and any specific production requirements.